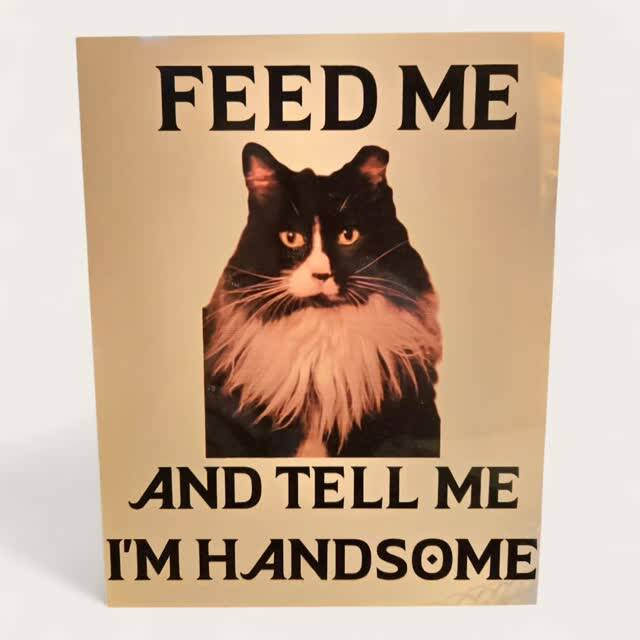
Okay, this one makes me laugh every single time I see it! I made a custom metal sign for my grandkitty using sublimation — his handsome little face printed in full color right on the metal, with the very accurate caption "FEED ME AND TELL ME I'M HANDSOME." 😂
If you've never tried sublimation, this is the perfect starter project. Unlike vinyl, there's no weeding, no layering, no transfer tape — you just print your design and press it. The ink actually infuses into the coating on the metal, so the photo comes out crisp, vibrant, and permanent. It won't peel, crack, or fade. Let me show you how!
Supplies
- White sublimation metal sign blank (aluminum — I used a rectangle, but bone, paw, and circle shapes all work)
- Sublimation printer with sublimation ink
- Sublimation paper
- Heat press (a flat press works best for metal blanks)
- Heat-resistant tape
- Butcher paper or protective paper
- Lint roller
Instructions
Step 1: Design your sign
Create your design in your favorite design program — I used a favorite photo of my grandkitty with bold text above and below: "FEED ME" on top, "AND TELL ME I'M HANDSOME" on the bottom. Size it to match your metal blank, leaving a small margin around the edges. Fun, chunky fonts work best — this sign is supposed to be funny!
Step 2: Mirror and print
This is the step everyone forgets the first time: **mirror your design before printing.** Since the print goes face-down on the blank, an unmirrored print comes out backwards. Print on sublimation paper using your sublimation printer's best quality photo setting.
Step 3: Prep your blank
Peel the protective film off your metal sign blank and give it a quick wipe with a lint roller or dry cloth. Any dust or fingerprint will show up in the final print, so make sure it's clean.
Step 4: Tape it down
Place your printed design face-down on the blank and secure it with heat-resistant tape on the edges. You want it snug with zero wiggle room — if the paper shifts during pressing, you'll get a blurry "ghost" image.
Step 5: Press it
Sandwich your blank between sheets of butcher paper (this protects your press from any ink blowout) and press at **400°F for 60 seconds** with medium-firm pressure. Check your specific blank manufacturer's recommendations — times can vary slightly.
Step 6: Peel and reveal
Carefully remove the blank from the press — it will be HOT, so use heat gloves! Peel the paper back while it's still warm and prepare to be delighted. Let the sign cool completely before handling.
Step 7: Hang and enjoy
Prop it by the food bowls, hang it on the wall, or gift it to a fellow pet lover. The print is permanent and scratch-resistant, so it'll look great for years.
Tips
- **Always mirror.** Seriously. Tape a sticky note to your printer if you have to — every sublimation crafter has pressed a backwards design at least once!
- **Use a high-resolution photo.** Phone photos work great as long as they're sharp — blurry in, blurry out.
- **Don't slide the press.** Lift straight up and down; any shifting while hot causes ghosting.
- **Butcher paper is non-negotiable.** It keeps stray ink off your heat press platen.
- **This makes an incredible gift.** Pet parents go wild for anything with their fur baby's face on it — pair it with treats for the ultimate present.
text.