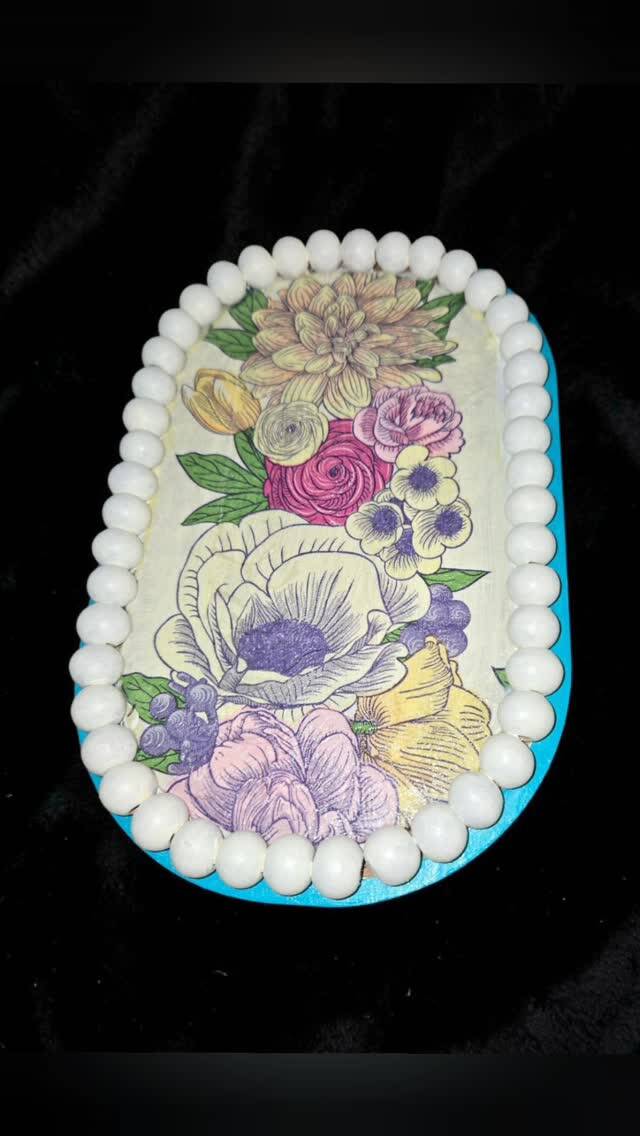
Upcycled Napkin Decoupage Tray
*I'm a Plaid content creator, and I made this project with their products!*
I am obsessed with this transformation, you guys! I took a plain old tray — the kind you'd walk right past at a thrift store — and turned it into something absolutely beautiful using nothing but a pretty paper napkin and Crystal Clear Mod Podge. That's it! This is one of my favorite upcycles because it looks like hand-painted art, but anyone can do it. Let me show you how.
Supplies
- An old tray (wood, metal, or plastic all work)
- A decorative paper napkin with a design you love
- Crystal Clear Mod Podge
- Foam brush or paint brush
- Scissors
- Fine sandpaper
- Base coat paint (white or a light color that complements your napkin)
- Soft cloth for smoothing
Instructions
Step 1: Prep your tray
Give the tray a good cleaning, then lightly sand any rough spots or glossy finish so the paint sticks. Wipe away the dust with a damp cloth.
Step 2: Paint a base coat
Brush on one or two coats of white or light-colored paint and let it dry completely. This step matters — a light base makes your napkin design pop and keeps dark colors from showing through the thin paper.
Step 3: Prep your napkin
Carefully separate your napkin's plies — you only want the single printed top layer. Napkins are usually 2 or 3 ply, and the printed layer is whisper-thin, which is exactly what makes it blend so seamlessly. Trim the napkin to fit your tray, leaving a little overhang you can trim later.
Step 4: Apply the first coat of Mod Podge
Brush a thin, even layer of Crystal Clear Mod Podge onto the tray surface where the napkin will go. Work in sections if your tray is large — you don't want it drying before the napkin is down.
Step 5: Lay down the napkin
Gently lay the napkin onto the wet Mod Podge, starting from one edge and smoothing outward with your fingers or a soft cloth. Go slowly and gently — the napkin is delicate when wet. Smooth out wrinkles and air bubbles as you go.
Step 6: Seal it up
Once the napkin is in place and the first layer is dry to the touch, brush 2–3 thin top coats of Crystal Clear Mod Podge over the whole thing, letting each coat dry in between. Trim any overhang with scissors or sand it off with fine sandpaper for a clean edge.
Step 7: Let it cure and enjoy
Let your tray cure fully (a few days is ideal for maximum durability), then put it to work — serving tray, catch-all, vanity organizer, or a gorgeous gift!
Tips
- Tearing the napkin edges instead of cutting gives a softer, more blended edge that disappears into the background.
- Thin coats are the secret — thick Mod Podge can wrinkle the napkin. Patience pays off!
- Crystal Clear Mod Podge dries completely clear, so your napkin colors stay true and vibrant.
- This technique works on boxes, planters, coasters, and frames too — once you start, you'll see napkin-able surfaces everywhere.
- If you're making a gift, tuck in a little card explaining it's hand-decoupaged. People love knowing the story!